How to choose a laser-2-Clara
Last Article we have talked about how to choose the important part of a laser–laser source. And hoping that article is able to offer you some useful information. This time, we are going to talk about the software of laser machines.
Brief Introduction of Software used in Laser Machines
Nowadays, the laser machines are all CNC, which are controlled by computer. Certainly the software for the machine has played a important role in the whole solution. For operation the whole machine, the software should support many Graphic formats, multiple languages and easy-operation. Apart from adapting local language, easy-operation is the most important point for clients.
Cause most operators for the machine will be workers without much technical skills and knowledge. In this case, you need to find a reliable supplier whose engineers are avaliable for working overseas. The engineers should have a comprehensive understanding for machine assembly and operation.
For different laser machine, there will be exclusive software for it, here we would like to introduce some that most Chinese suppliers are adopting.
1: Laser marking system
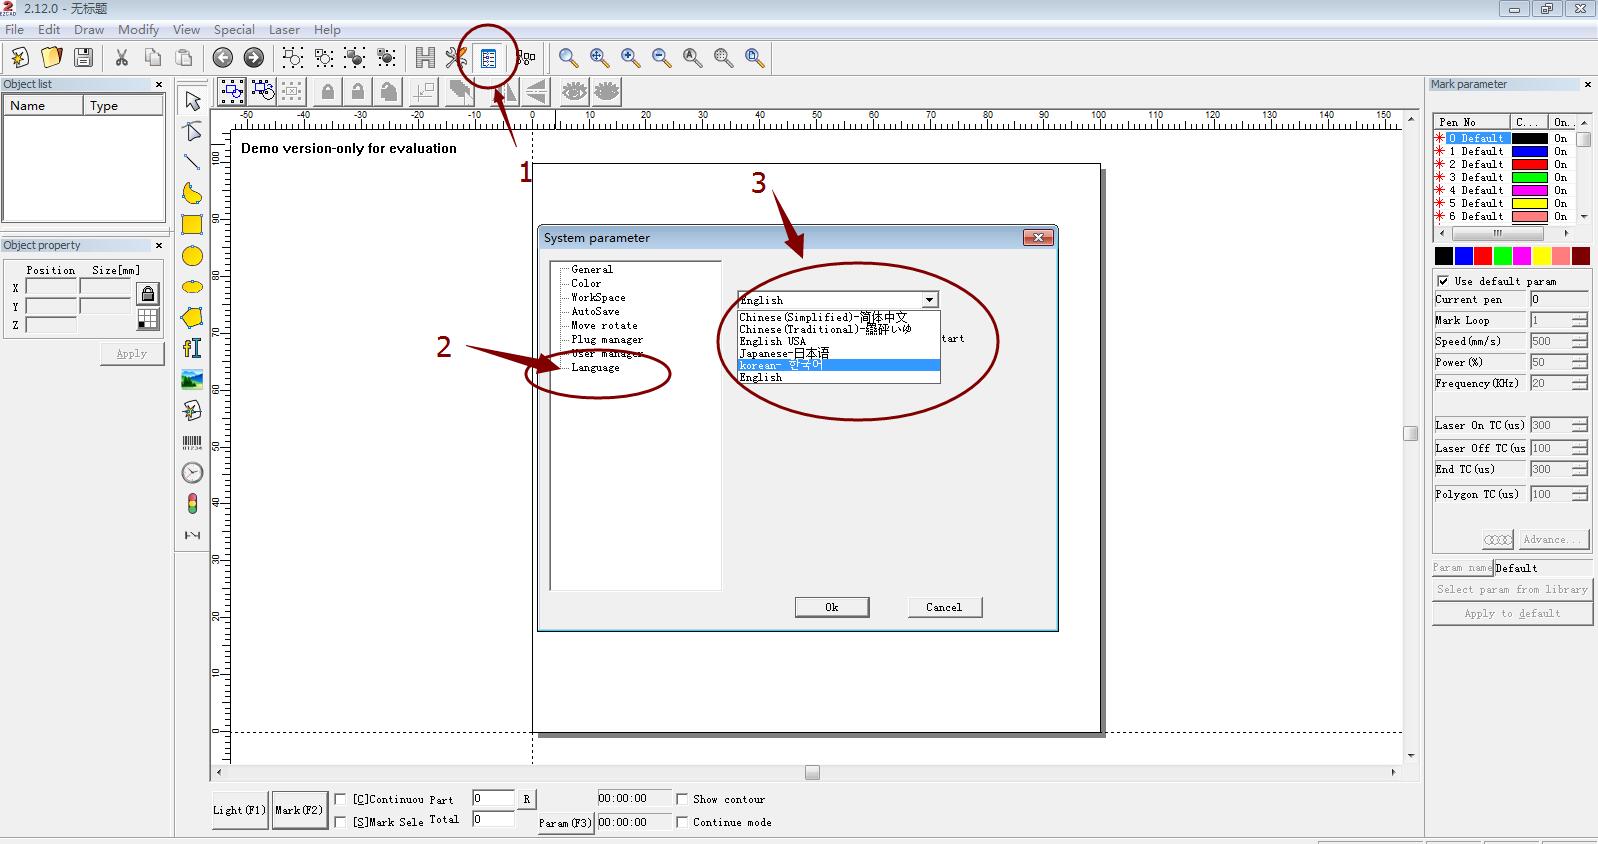
The most pratical software for laser marking machine right now in China is EZCAD, which is coming from Beijing JCZ. It is able to theoretically support bmp, jpg, gif, tga, png, tif, ai, dxf, dst, plt etc. But based on our clients, it is better to use DXF. format. The most important point for EZCAD is its easy-operation. For a noob in laser industry, it takes only ten minutes for him/her to manage the basic operation. Here are some steps for EZCAD:
This is how to choose language, very easy, just following steps 1, 2, 3.
This is how to write text in it, step 4 is to fullfill the inside of the text for better marking results. For step 5, the line distance is more little, the marking result will be much darker. So there will be a little technical skills for marking some specific content.
This picture is for making the machine working. You can change the marking results by changing the parameters in step one; and for step 2, when you tap it, there will be red light contour on the materials, it is for positioning the accurate marking positon.
Here is a simply operation video of EACAD: https://youtu.be/DS8EXBFJ6pw
And if you need more information, please contact Clara : xintian115@xtlaser.com 008613335151833


